How to Increase DPI of an Image Without Losing Quality
Check an image’s DPI, change it to 300 for printing, and add real pixels when the photo is too small. Free steps for Windows, Mac, Photoshop and AI upscaling.


Want to fix your photo right away?Open Image Upscaler
Changing an image’s DPI from 72 to 300 does not make it sharper. DPI is only a note that tells a printer how many pixels to place in each inch. What decides whether a photo prints sharp is how many pixels it has. So the fix has two cases: if the photo has enough pixels, you only change the DPI number; if it doesn’t, you add pixels first and then set 300 DPI. This guide shows how to tell which case you’re in and how to handle each one.
What does DPI mean for a photo?
DPI (dots per inch), often called PPI (pixels per inch) for digital images, is the number of pixels printed in each inch of paper. A 3000-pixel-wide photo printed at 300 DPI is 10 inches wide; the same file at 150 DPI prints 20 inches wide but looks softer.
DPI has no effect on screens. A website, a phone or a social media app shows the pixels and ignores the DPI field. The 72 or 96 DPI you often see is a default left by screens and cameras, not a sign of low quality.
How do I check the DPI of an image?
Check the pixel size and the DPI together, because you need both.
- Windows: right-click the file, choose Properties, open the Details tab and read Dimensions (pixels) and Horizontal resolution (DPI).
- Mac (Preview): open the image and choose Tools > Adjust Size. The window shows the width and height in pixels and the Resolution in pixels per inch.
- Photoshop: choose Image > Image Size and read Width, Height (set to pixels) and Resolution.
Write down the pixel width and height; the next step depends on them.
How many pixels do I need for a 300 DPI print?
Multiply each side of the print in inches by 300. That gives the pixels the photo needs for a sharp print at 300 DPI:
- 4 × 6 in: 1200 × 1800 px
- 5 × 7 in: 1500 × 2100 px
- 8 × 10 in: 2400 × 3000 px
- 8.5 × 11 in (Letter): 2550 × 3300 px
- A4 (8.3 × 11.7 in): 2480 × 3508 px
- 11 × 14 in: 3300 × 4200 px
- 16 × 20 in: 4800 × 6000 px
If your photo is at least that big, it already has enough pixels; only the DPI number needs changing. If it’s smaller, the print will look soft or blocky at 300 DPI, and you need to add pixels first. Large posters seen from a few feet away still look fine at 150 to 200 DPI, so they need half to two thirds of these numbers.
How do I change the DPI to 300 without changing the image?
When the photo has enough pixels, change only the DPI field and turn resampling off. The pixels stay exactly as they are, so this step doesn’t change the quality. Saving as JPG again compresses the image once more, so save at high quality.
Photoshop
- Open Image > Image Size.
- Turn off Resample.
- Set Resolution to 300 pixels/inch and click OK. The print size updates; the pixel size stays the same.
Preview on Mac
- Open Tools > Adjust Size.
- Turn off Resample image.
- Set Resolution to 300 pixels/inch and save.
GIMP (free, Windows and Mac)
- Open Image > Print Size.
- Set X resolution and Y resolution to 300 pixels/in and click OK.
- Export the image as JPG or PNG.
Windows has no built-in way to change DPI: Paint can show it but not change it. Use GIMP or a free online DPI changer for that step.
How do I increase DPI when the image is too small?
When the photo has fewer pixels than the print needs, add pixels with an AI upscaler, then print at 300 DPI. Raising the DPI number alone just makes the print smaller, and enlarging in a normal editor only stretches the existing pixels, so edges and fine texture turn soft.
- Open the Image Upscaler and upload the photo (JPG, PNG or WebP).
- Pick an output size big enough for the print. 4K (3840 px on the long side) prints sharp up to about 12.8 inches, and 8K (7680 px) up to about 25 inches.
- Choose Standard for a quick result on the daily free credits, or Pro for finer texture and the 8K size.
- Download the result. Clarpex saves it at 300 DPI, so it opens print-ready; there’s no need to change the DPI afterwards.
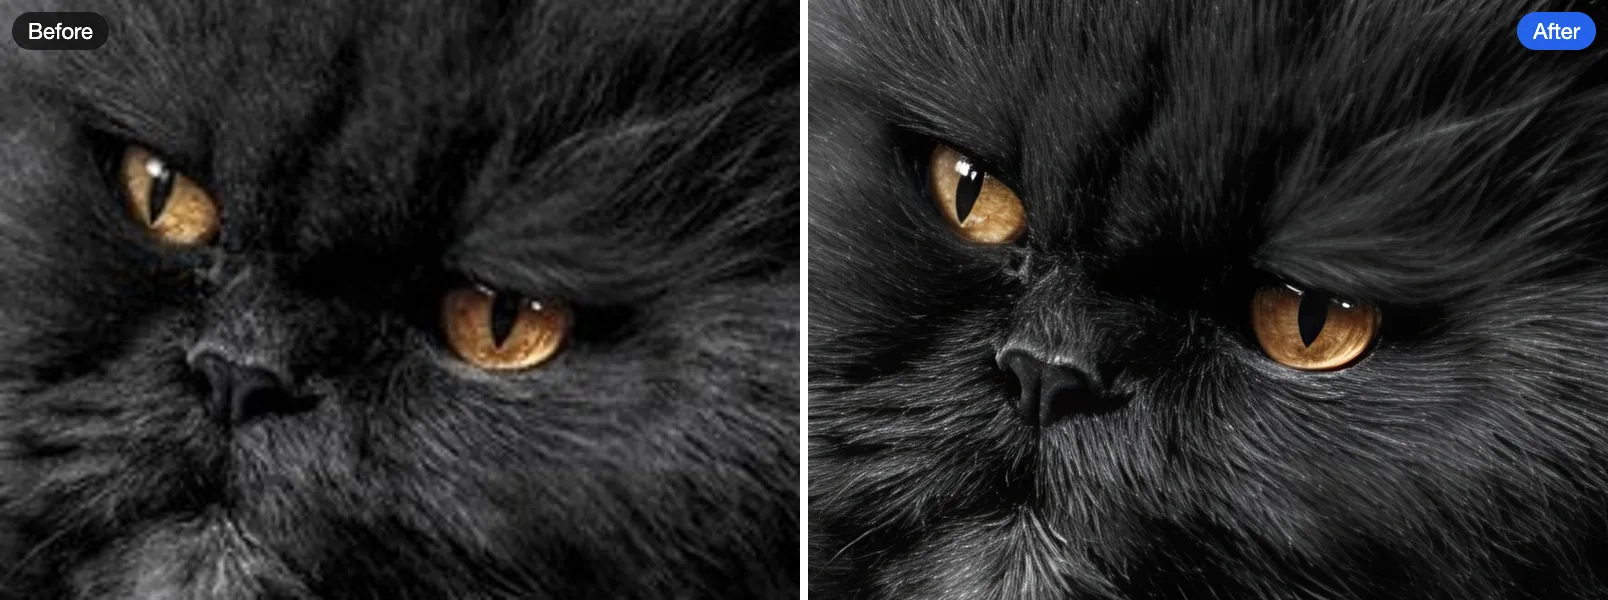
The Image Upscaler rebuilds real detail up to about 4 times the original size. Beyond that, the rest of the enlargement is a plain resize, so a 400-pixel thumbnail won’t make a sharp poster. For very small photos, aim for a smaller print or find a larger original.
If you only need a common screen size such as 1080p or 2K, the HD Photo Converter does the same job with HD presets and also saves at 300 DPI.
When won’t a higher DPI help?
- The photo is blurry. Missed focus or camera shake stays blurry at any DPI. Fix it with Unblur Image first, then upscale if the print still needs more pixels.
- The photo shows blocks from heavy compression. Remove the squares with Unpixelate Image before enlarging.
- The image is only for screens. Websites, email and social media ignore DPI; only the pixel size matters there.
- A larger original exists. The full-size file from the camera, the phone’s photo library or the person who sent it always beats an upscaled copy.
Quick answers
Is 72 DPI bad for printing? Only if the photo has too few pixels. A 72 DPI file with enough pixels prints just as sharp once you set it to 300 DPI without resampling.
Does changing the DPI reduce quality? Not with resampling off: the pixels don’t change. With resampling on, the editor adds or removes pixels, which can soften the image, and re-saving a JPG compresses it again.
What DPI should I use for printing photos? 300 DPI is the standard for photo prints, flyers and books. Posters and canvas prints viewed from a distance look fine at 150 to 200 DPI.
Can I increase the DPI of an image for free? Yes. Changing the DPI field is free in Preview on a Mac and in GIMP, and the Standard version of the Image Upscaler adds pixels on the free credits everyone gets each day, with no sign-up.
Try it on your own photo
Upscale photos to 2K, 4K or 8K with AI.